こんにちは、サーバーサイドエンジニアの菅原です。
今回は前回の続き「swift3でニュース配信アプリを作ってみる #1 (storyboard編)」
で実装のソースをベースにみていきたいと思います。
URLSessionを使ってHTTP通信する
- urlRequestに取得したいapiのリクエストURLを設定する
- URLSessionを使ってタスクを作る
- Jsonの結果データを取得する
- 返って来たデータを整形し、Article.swiftのオブジェクトの中に入れていく。
- task.resume()でタスクを開始する
    var articles: [Article]? = []

    override func viewDidLoad() {
        super.viewDidLoad()
        // Do any additional setup after loading the view, typically from a nib.
        getArticles()
    }

    func getArticles() {
        let urlRequest = URLRequest(url: URL(string: "https://newsapi.org/v1/articles?source=techcrunch&sortBy=latest&apiKey=1125d5f179304a4abe798dc427faed07")!)

        let task = URLSession.shared.dataTask(with: urlRequest) { (data,response,error) in

            if error != nil {
                print(error)
                return
            }

            // Article.swift
            self.articles = [Article]()
            do {
                let json = try JSONSerialization.jsonObject(with: data!, options: .mutableContainers) as! [String : AnyObject]
                if let articlesFromJson = json["articles"] as? [[String : AnyObject]] {
                    for articleFromJson in articlesFromJson {
                        let article = Article()
                        if let title = articleFromJson["title"] as? String, let url = articleFromJson["url"] as? String, let urlToImage = articleFromJson["urlToImage"] as? String {

                            article.title = title
                            article.url = url
                            article.imageUrl = urlToImage
                        }
                        self.articles?.append(article)
                    }
                }
                DispatchQueue.main.async {
                    self.tableview.reloadData()
                }

            } catch let error {
                print(error)
            }


        }

        task.resume()

    }
tableViewに表示設定する
- tableViewの関数にセルのデータをセットする
- extensionの拡張機能を使い画像データを取得する
func tableView(_ tableView: UITableView, cellForRowAt indexPath: IndexPath) -> UITableViewCell {
        let cell = tableView.dequeueReusableCell(withIdentifier: "articleCell", for: indexPath) as! ArticleCell
        cell.title.text = self.articles?[indexPath.item].title
        cell.imgView.downloadImage(from: (self.articles?[indexPath.item].imageUrl!)!)

        return cell
    }

    func numberOfSections(in tableView: UITableView) -> Int {
        return 1
    }

    func tableView(_ tableView: UITableView, numberOfRowsInSection section: Int) -> Int {
        return self.articles?.count ?? 0
    }

extension UIImageView {

    func downloadImage(from url: String){

        let urlRequest = URLRequest(url: URL(string: url)!)

        let task = URLSession.shared.dataTask(with: urlRequest) { (data,response,error) in

            if error != nil {
                print(error)
                return
            }

            DispatchQueue.main.async {
                self.image = UIImage(data: data!)
            }
        }
        task.resume()
    }
}
シミュレータで実行する
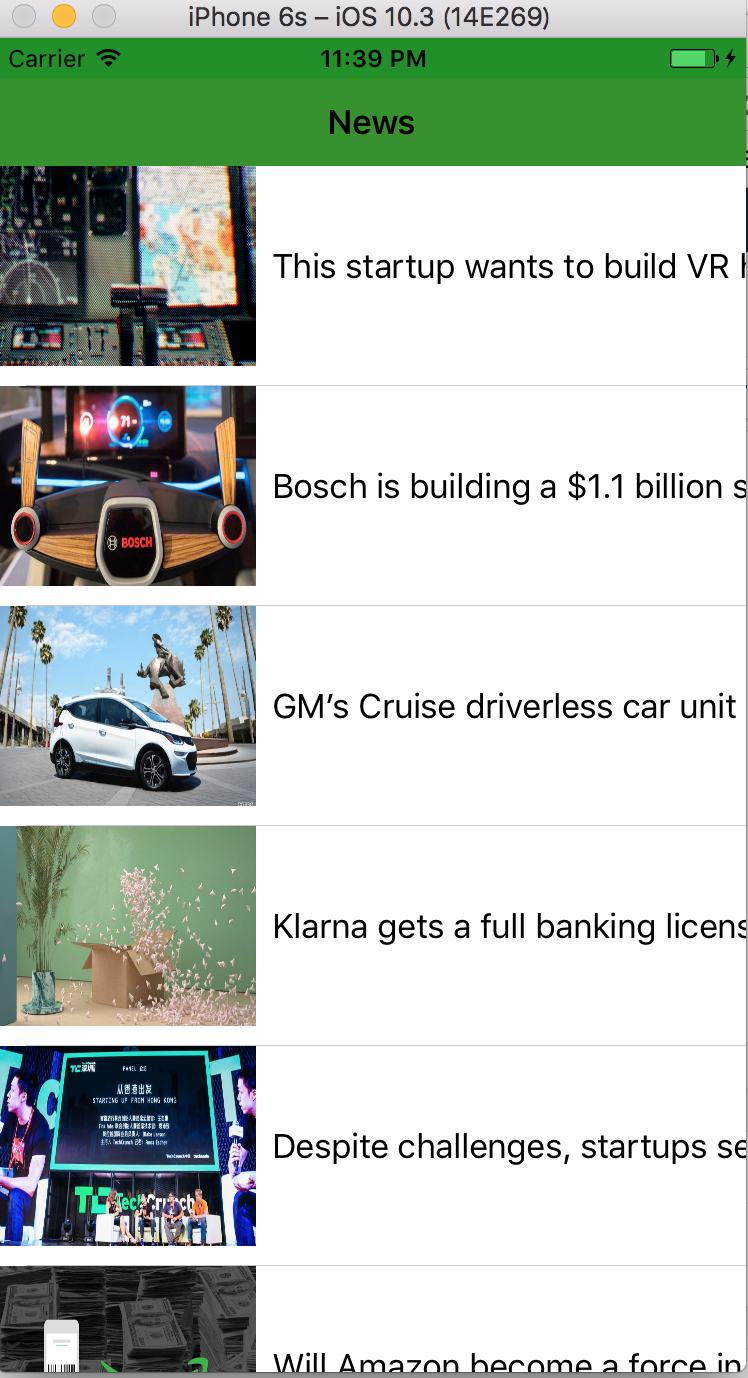
これで簡単なニュース配信をするアプリを作ることができました。
まとめ
- storyboardの使い方に慣れるのが時間がかかる
- Http通信をするiosのAPIが使いやすくて簡単にデータを取ることができた。
- TableViewが少し初心者には難しかった。
次回は音楽やfirebaseなどと連携させたアプリも作っていきたい。