こんにちは、サーバーサイドエンジニアの菅原です。
今回はWWDC2017にてios11やxcode9の発表など盛り上がりを見せているAppleから
Swift3に触れてみたいと思い簡単な二部構成のニュース配信アプリを開発しました。
環境と用意するもの
- News API (Tech Crunch APIを使用しました)
- https://newsapi.org/techcrunch-api
- swift3
- xcode8.3
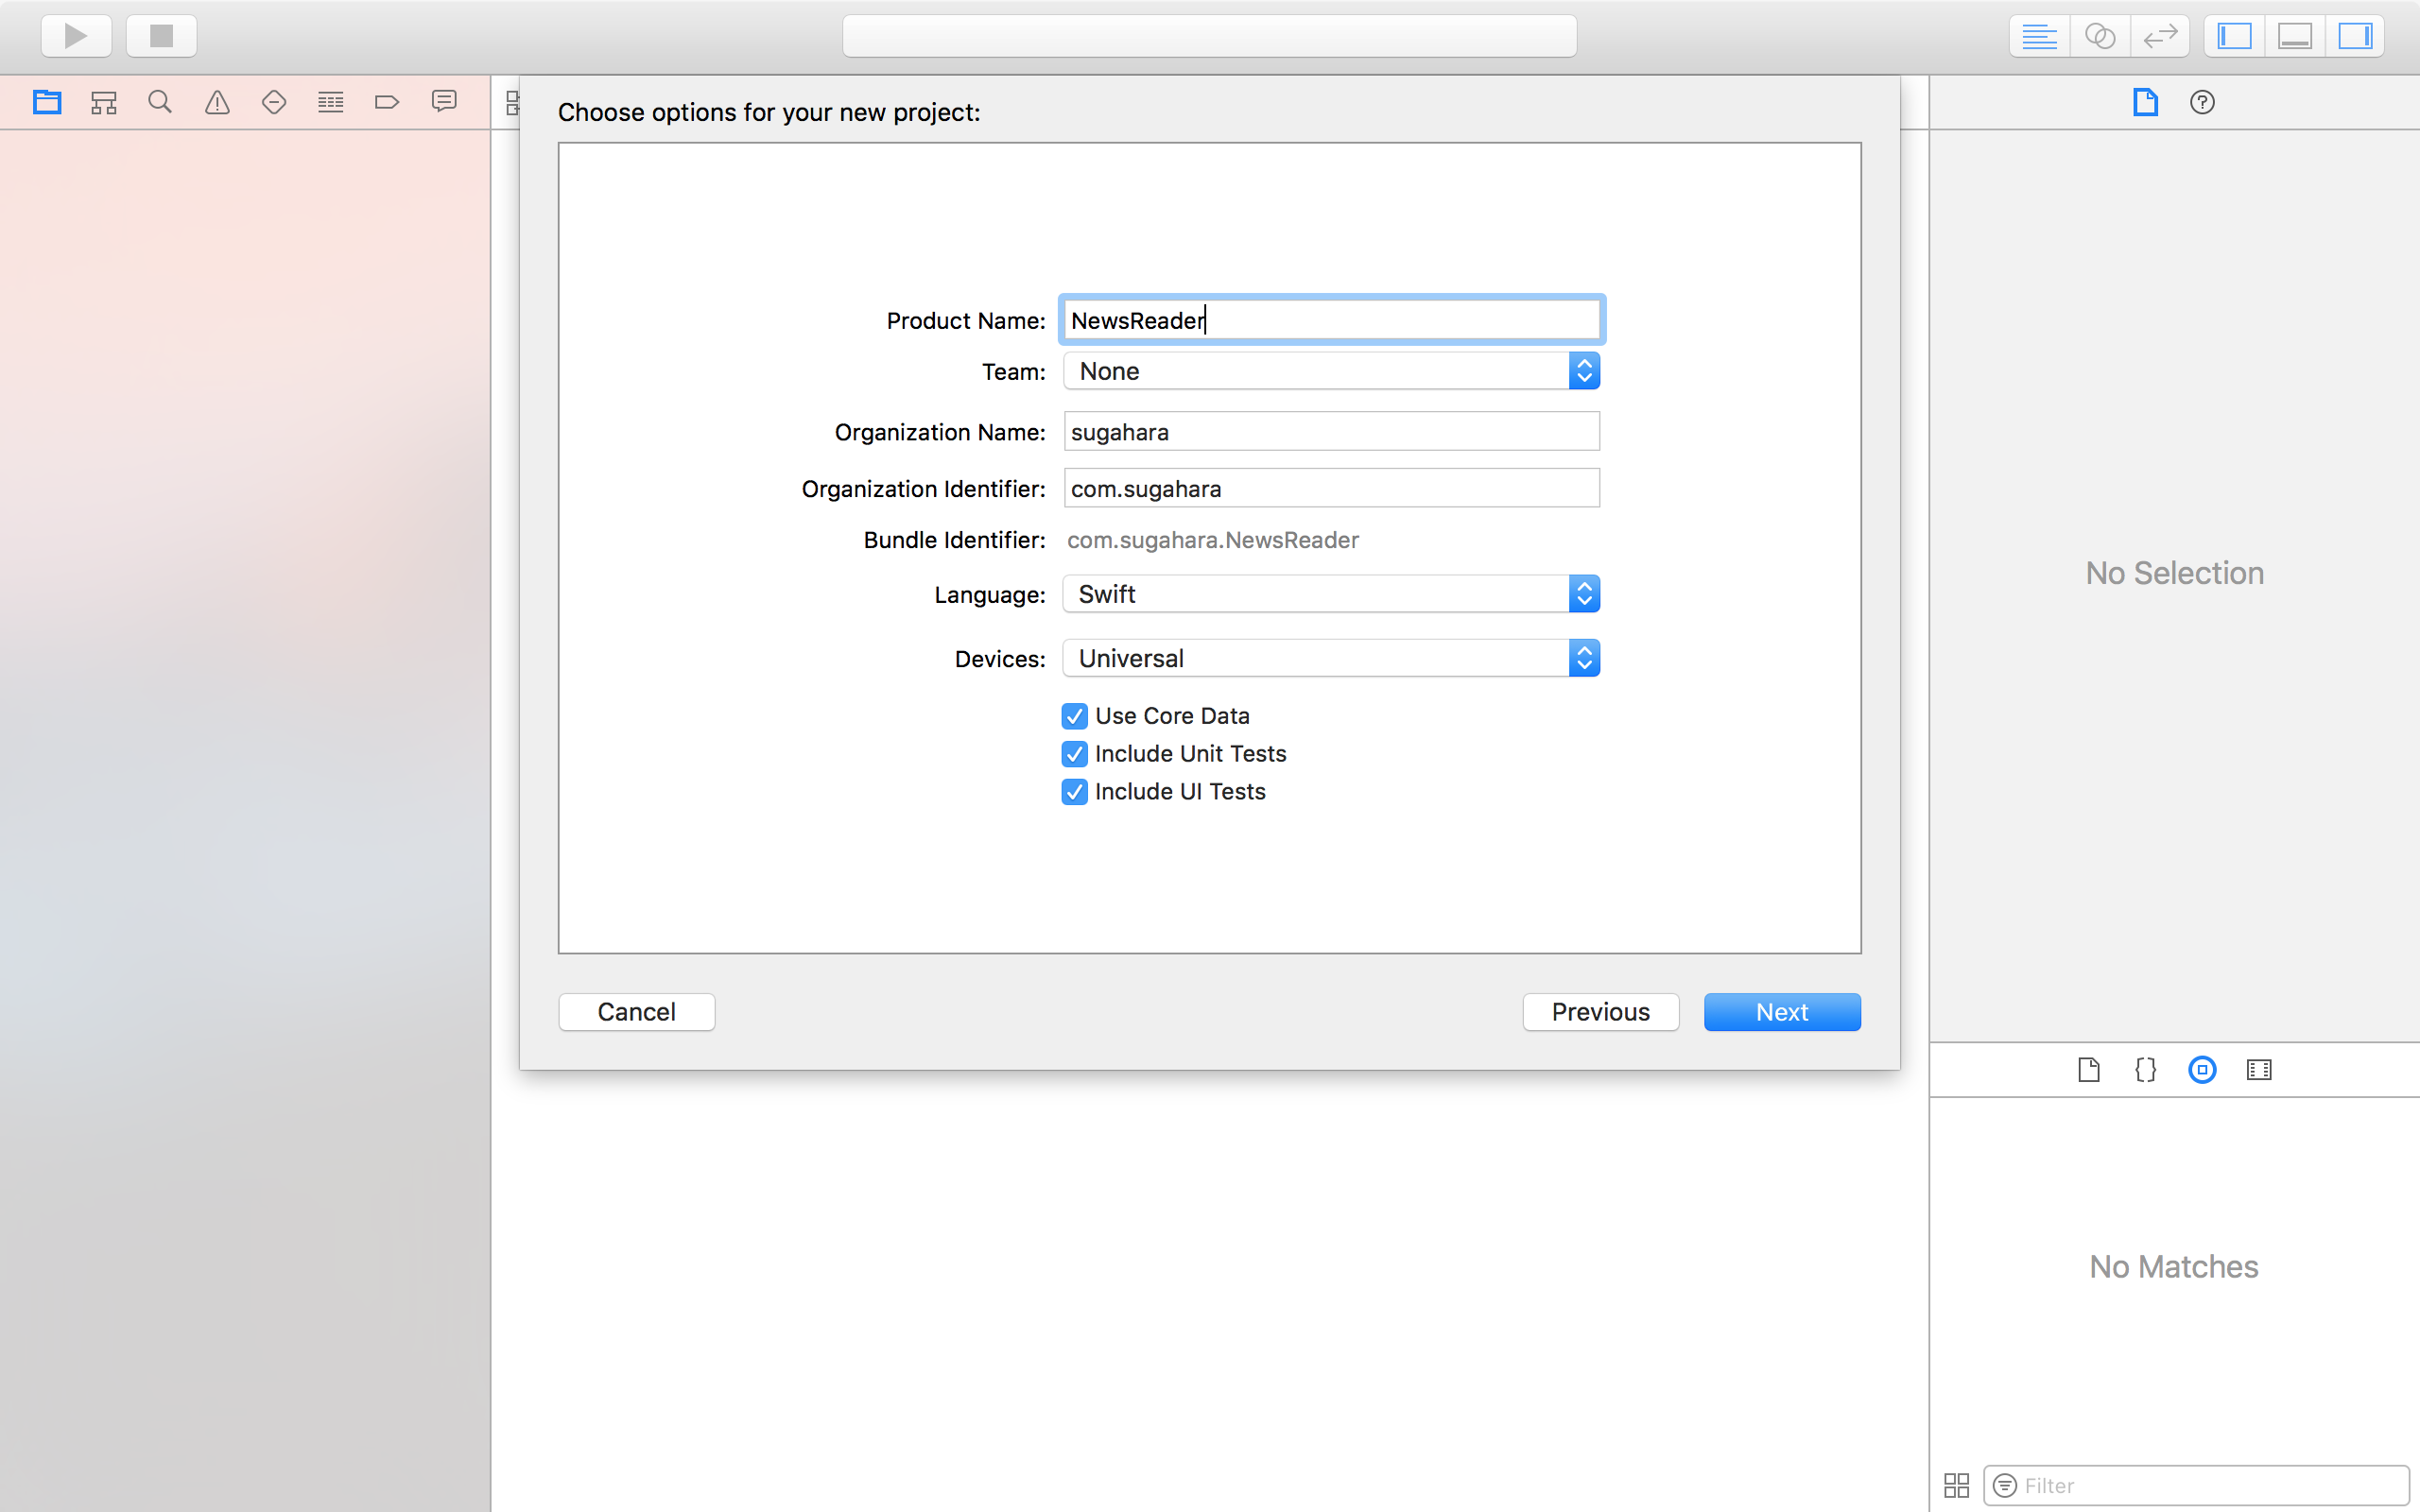
プロジェクトを作成する
ニュース記事のレイアウトを設置する
- NavigationVar
- TableView

- それぞれの部品についてはConstrainを適用させる。
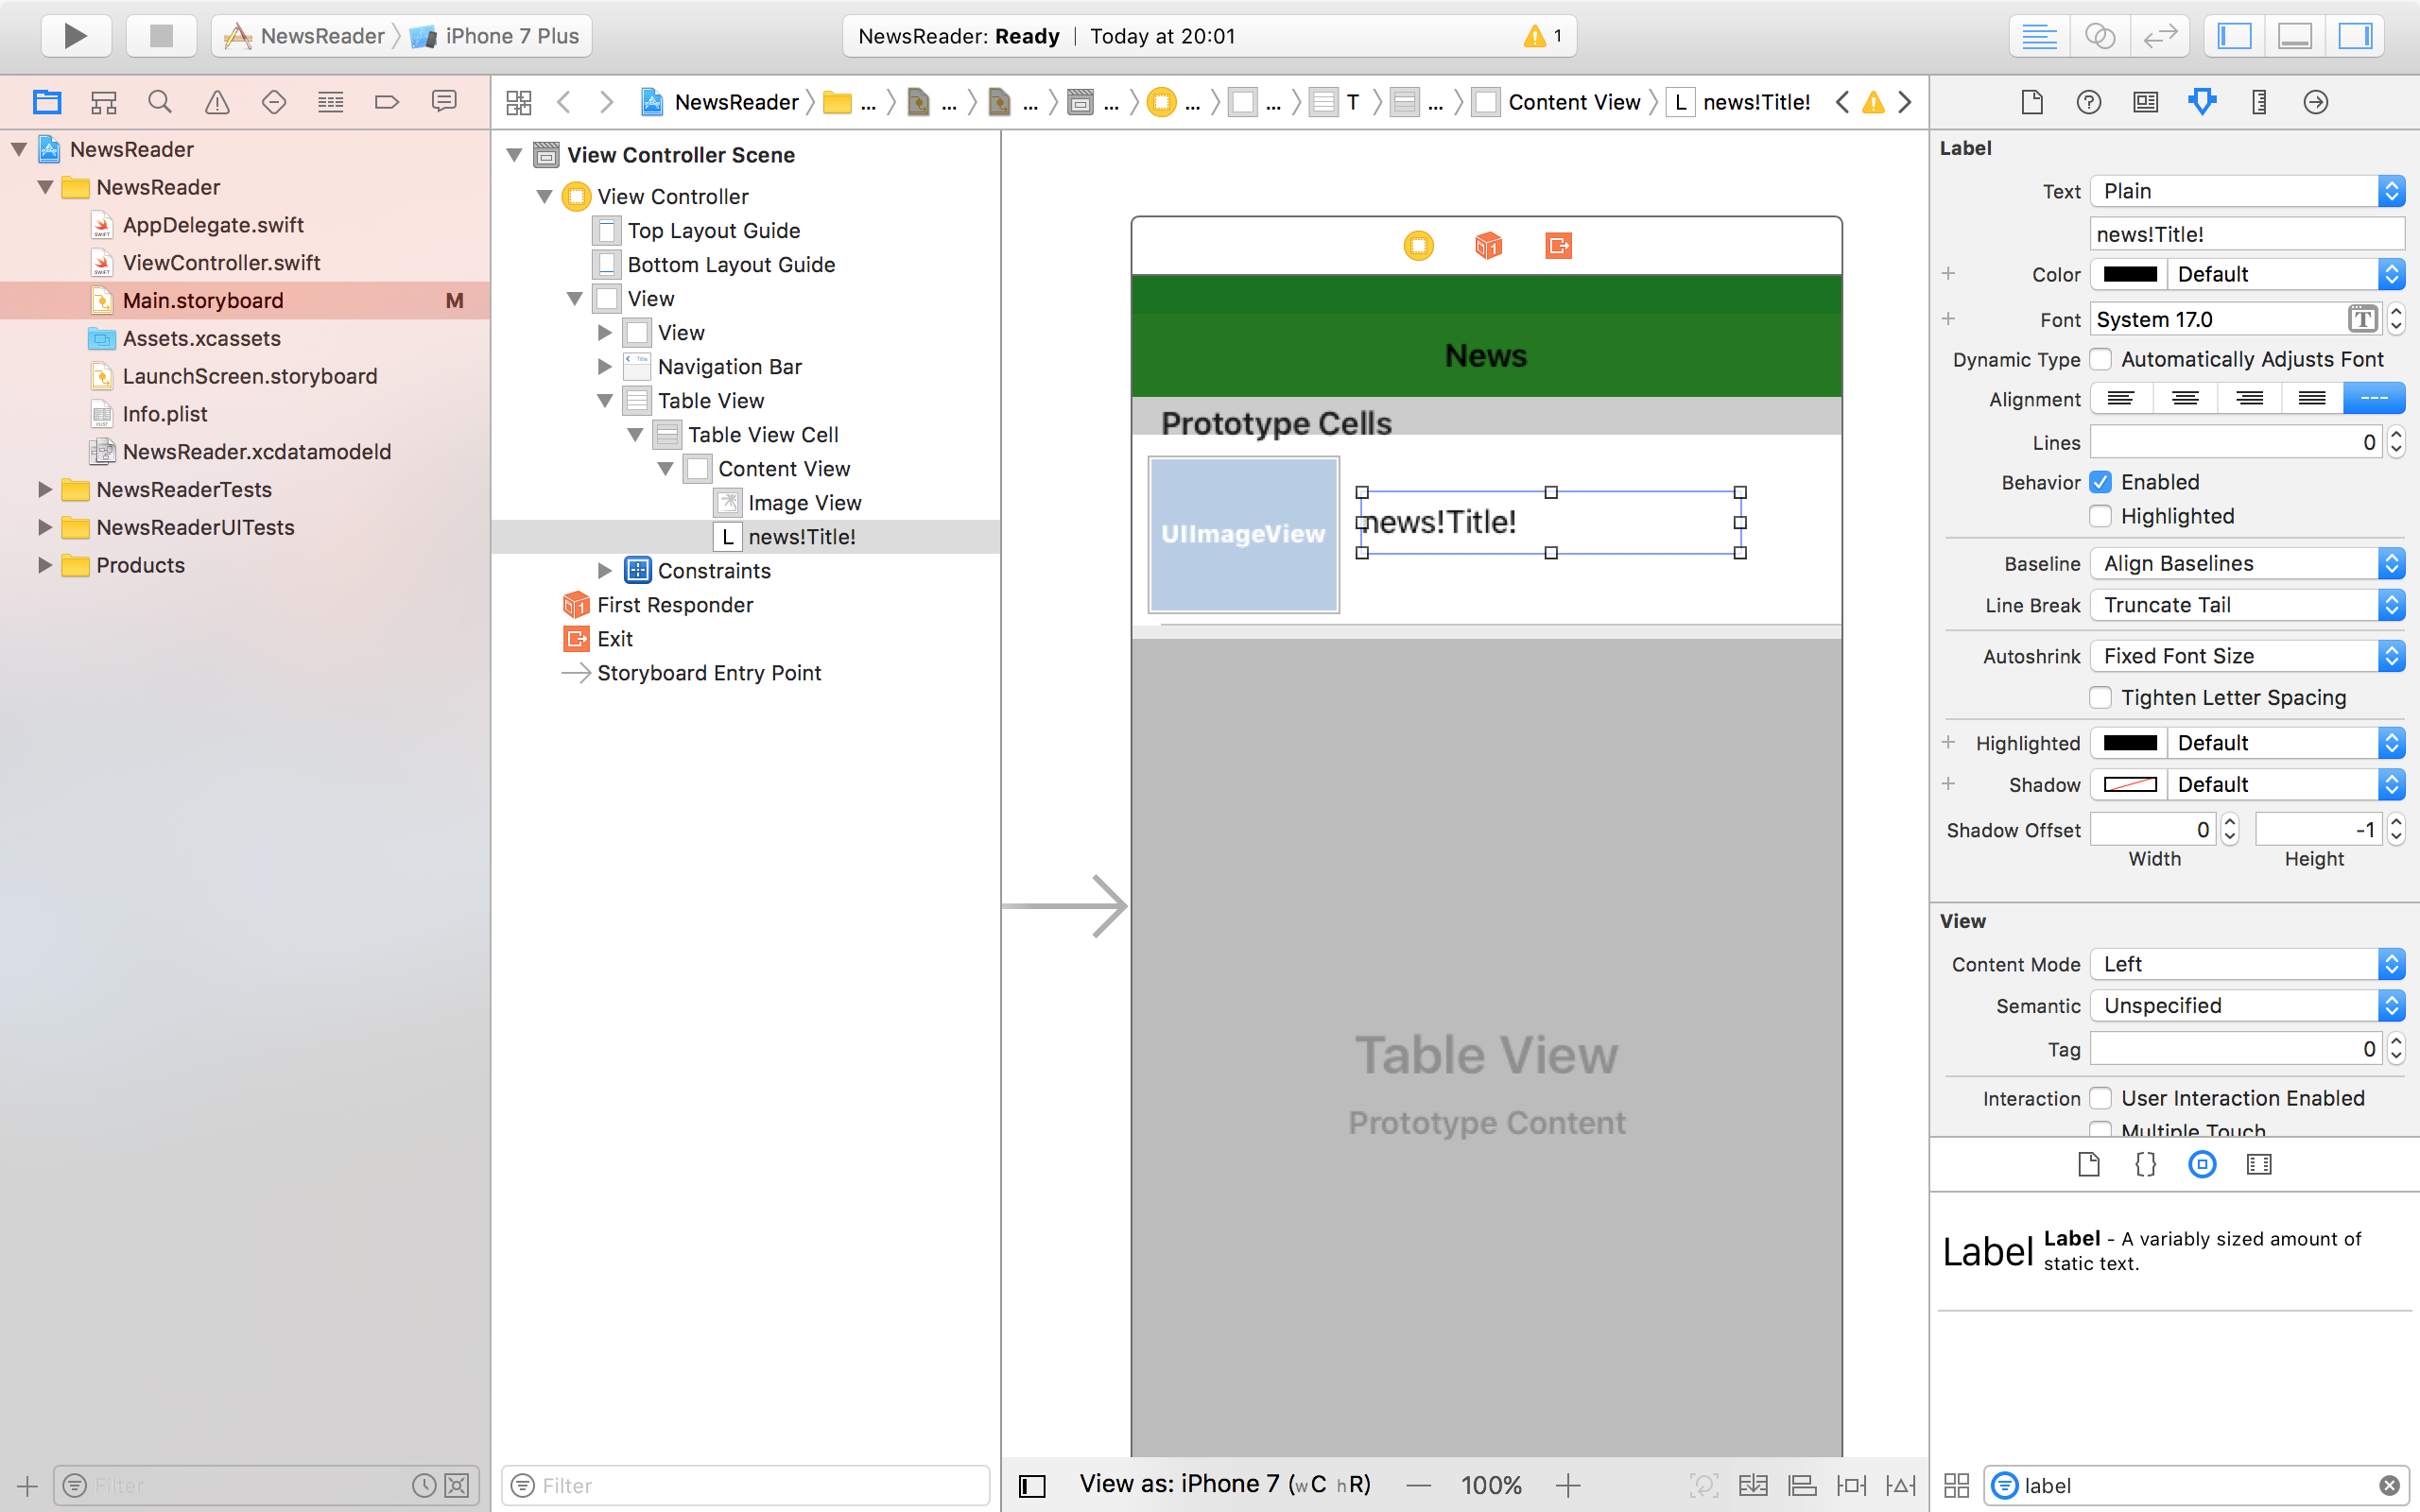
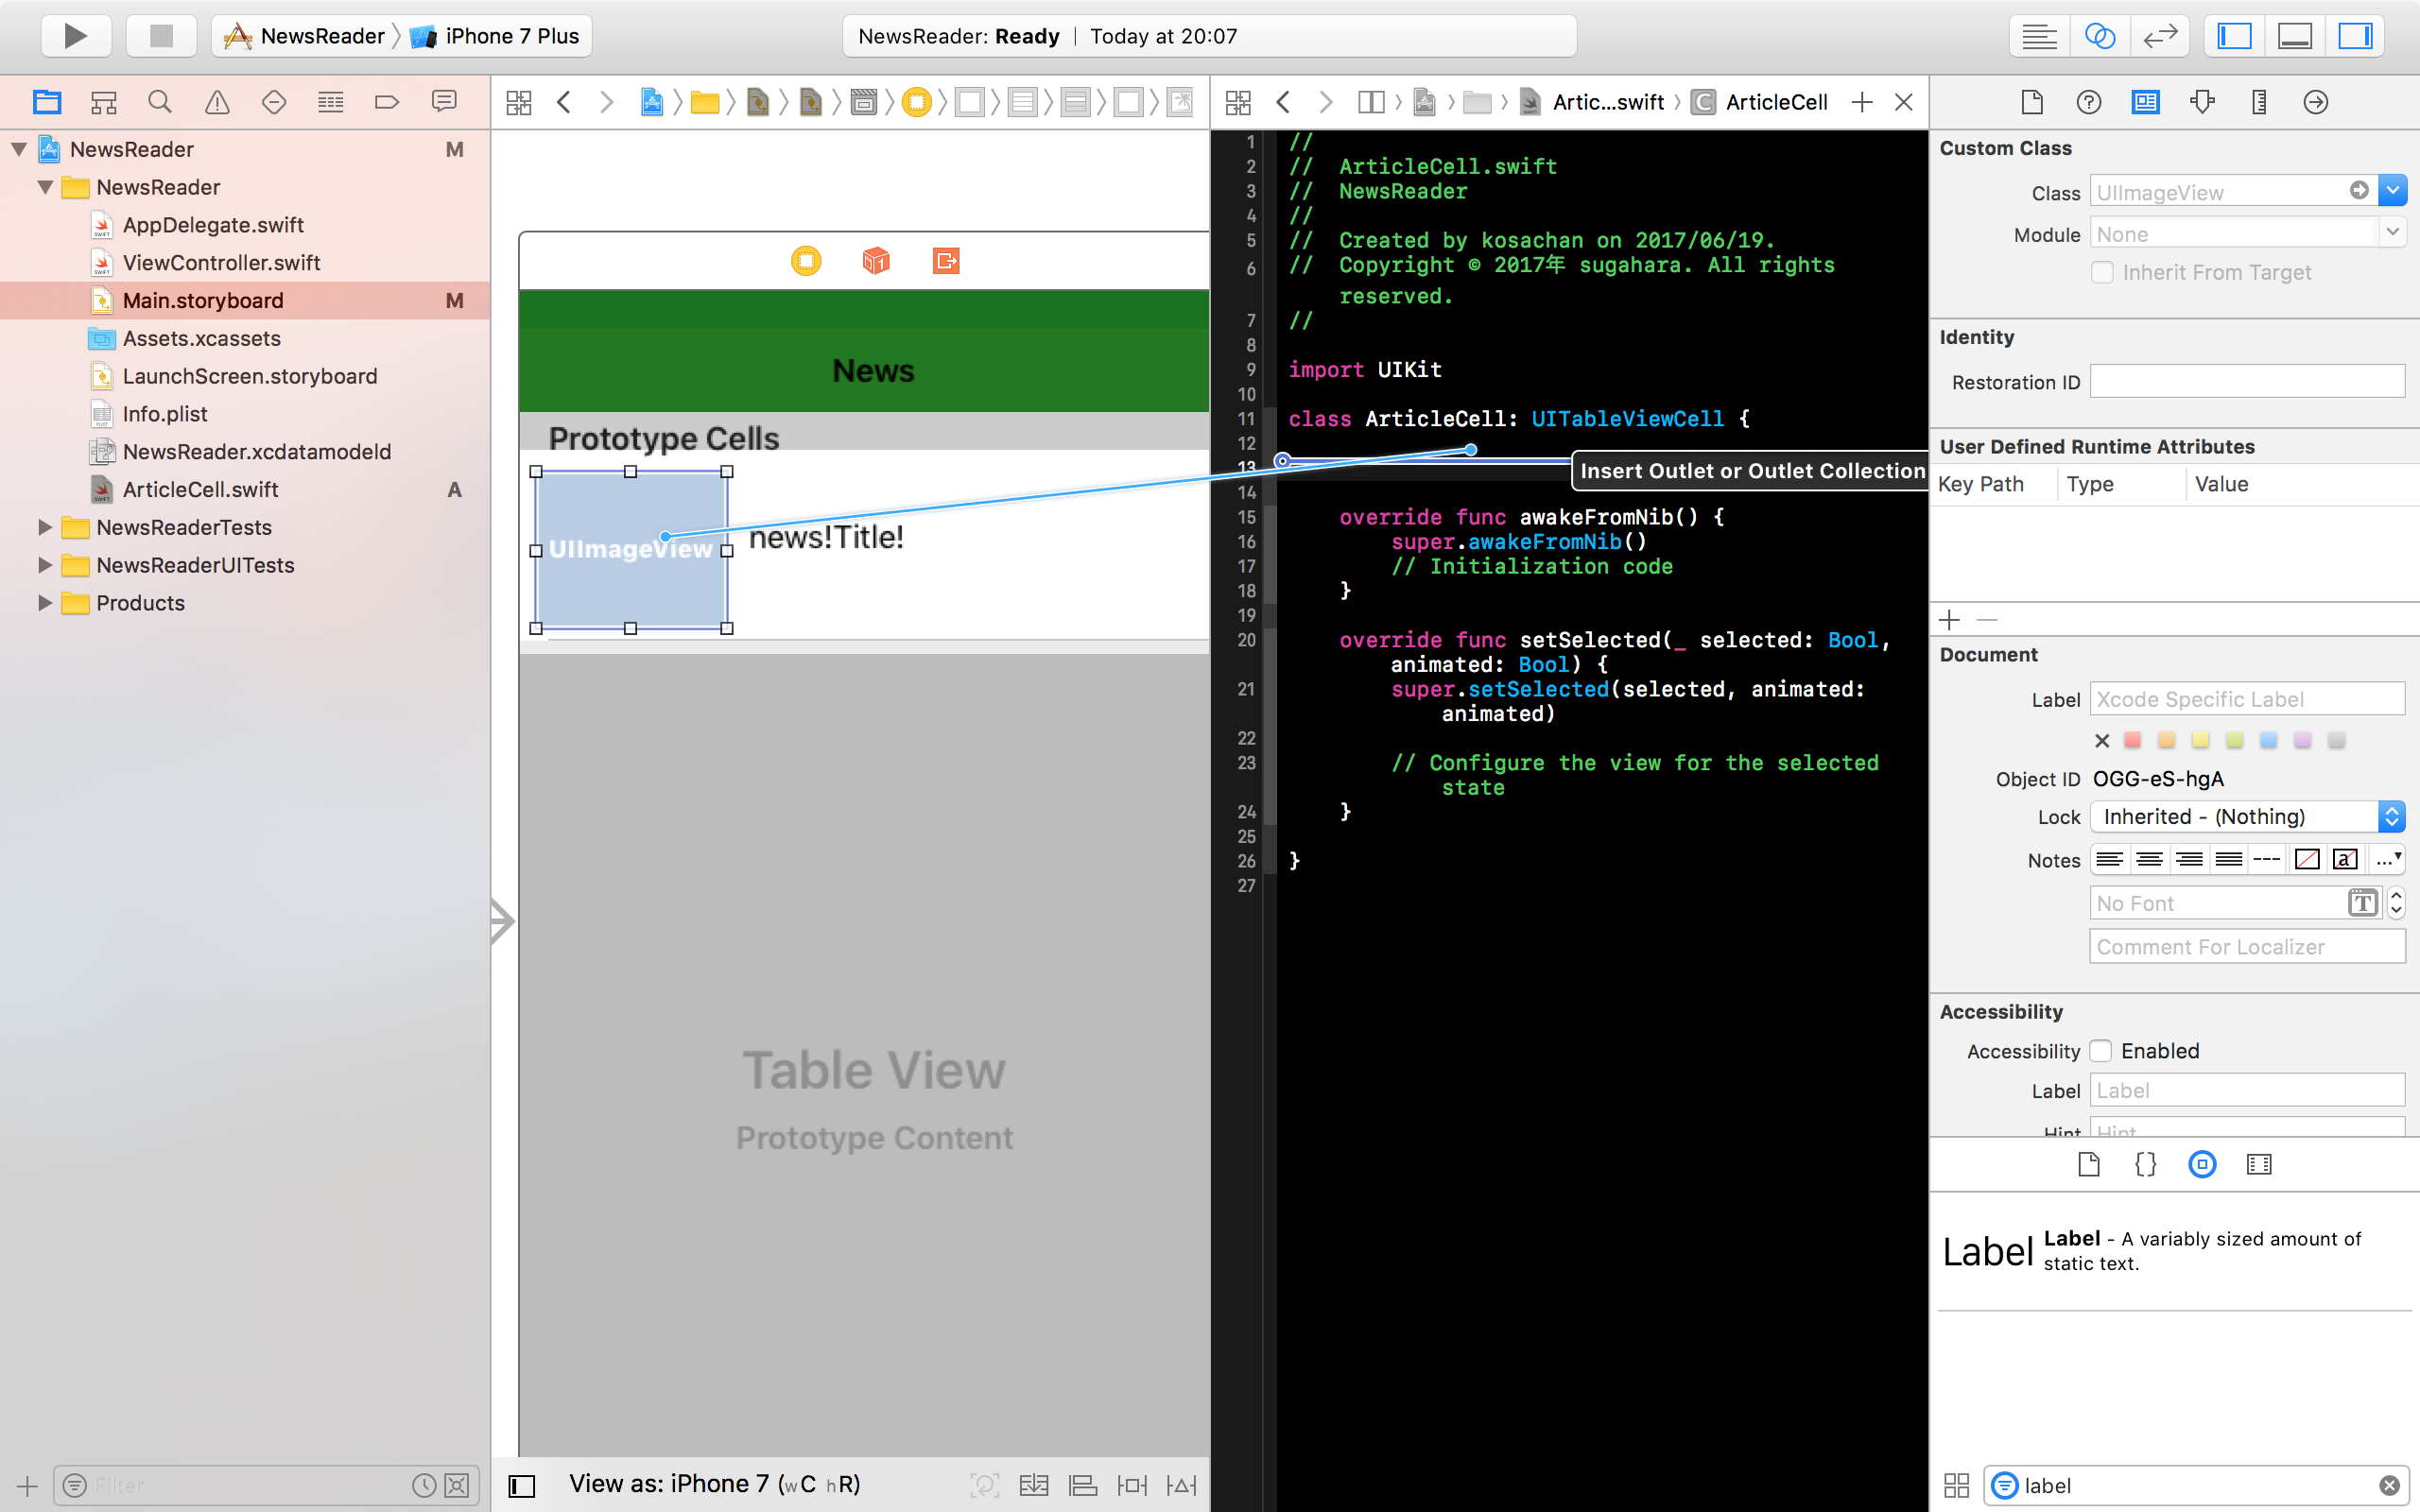
UIを設置する
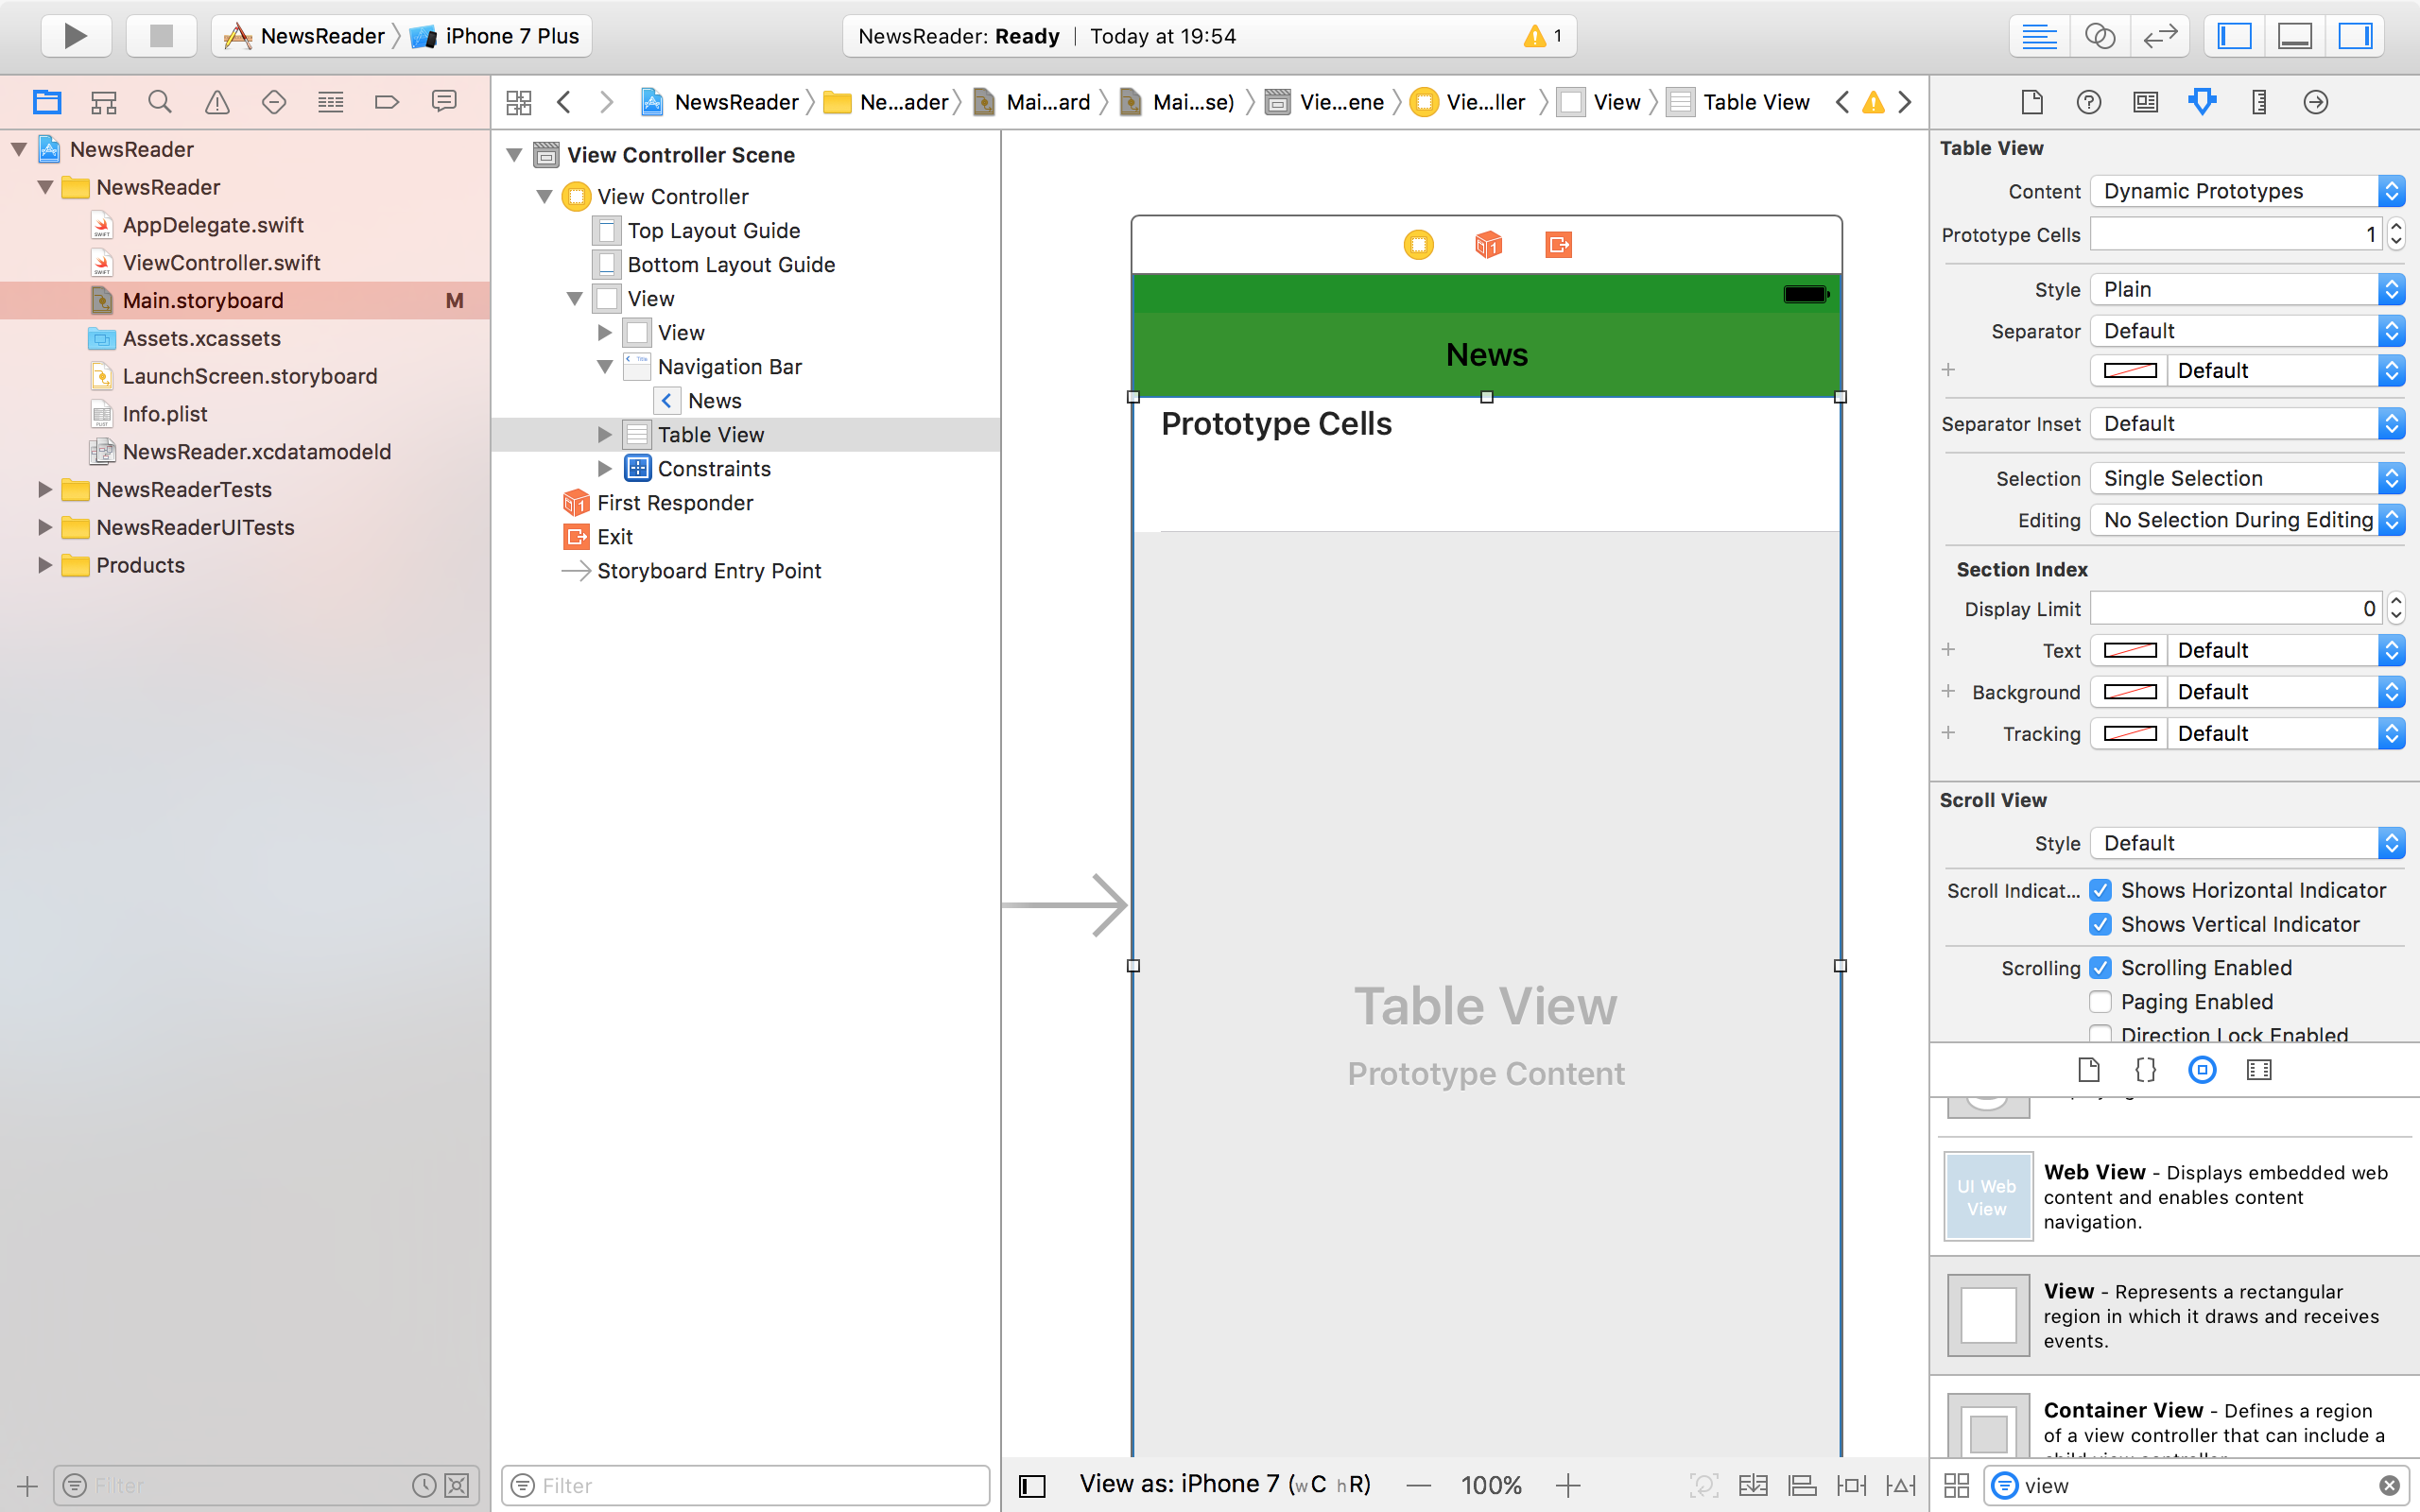
- Prototype Cellsを1に設定する
- Image Viewを設置する
- Labelを設置する
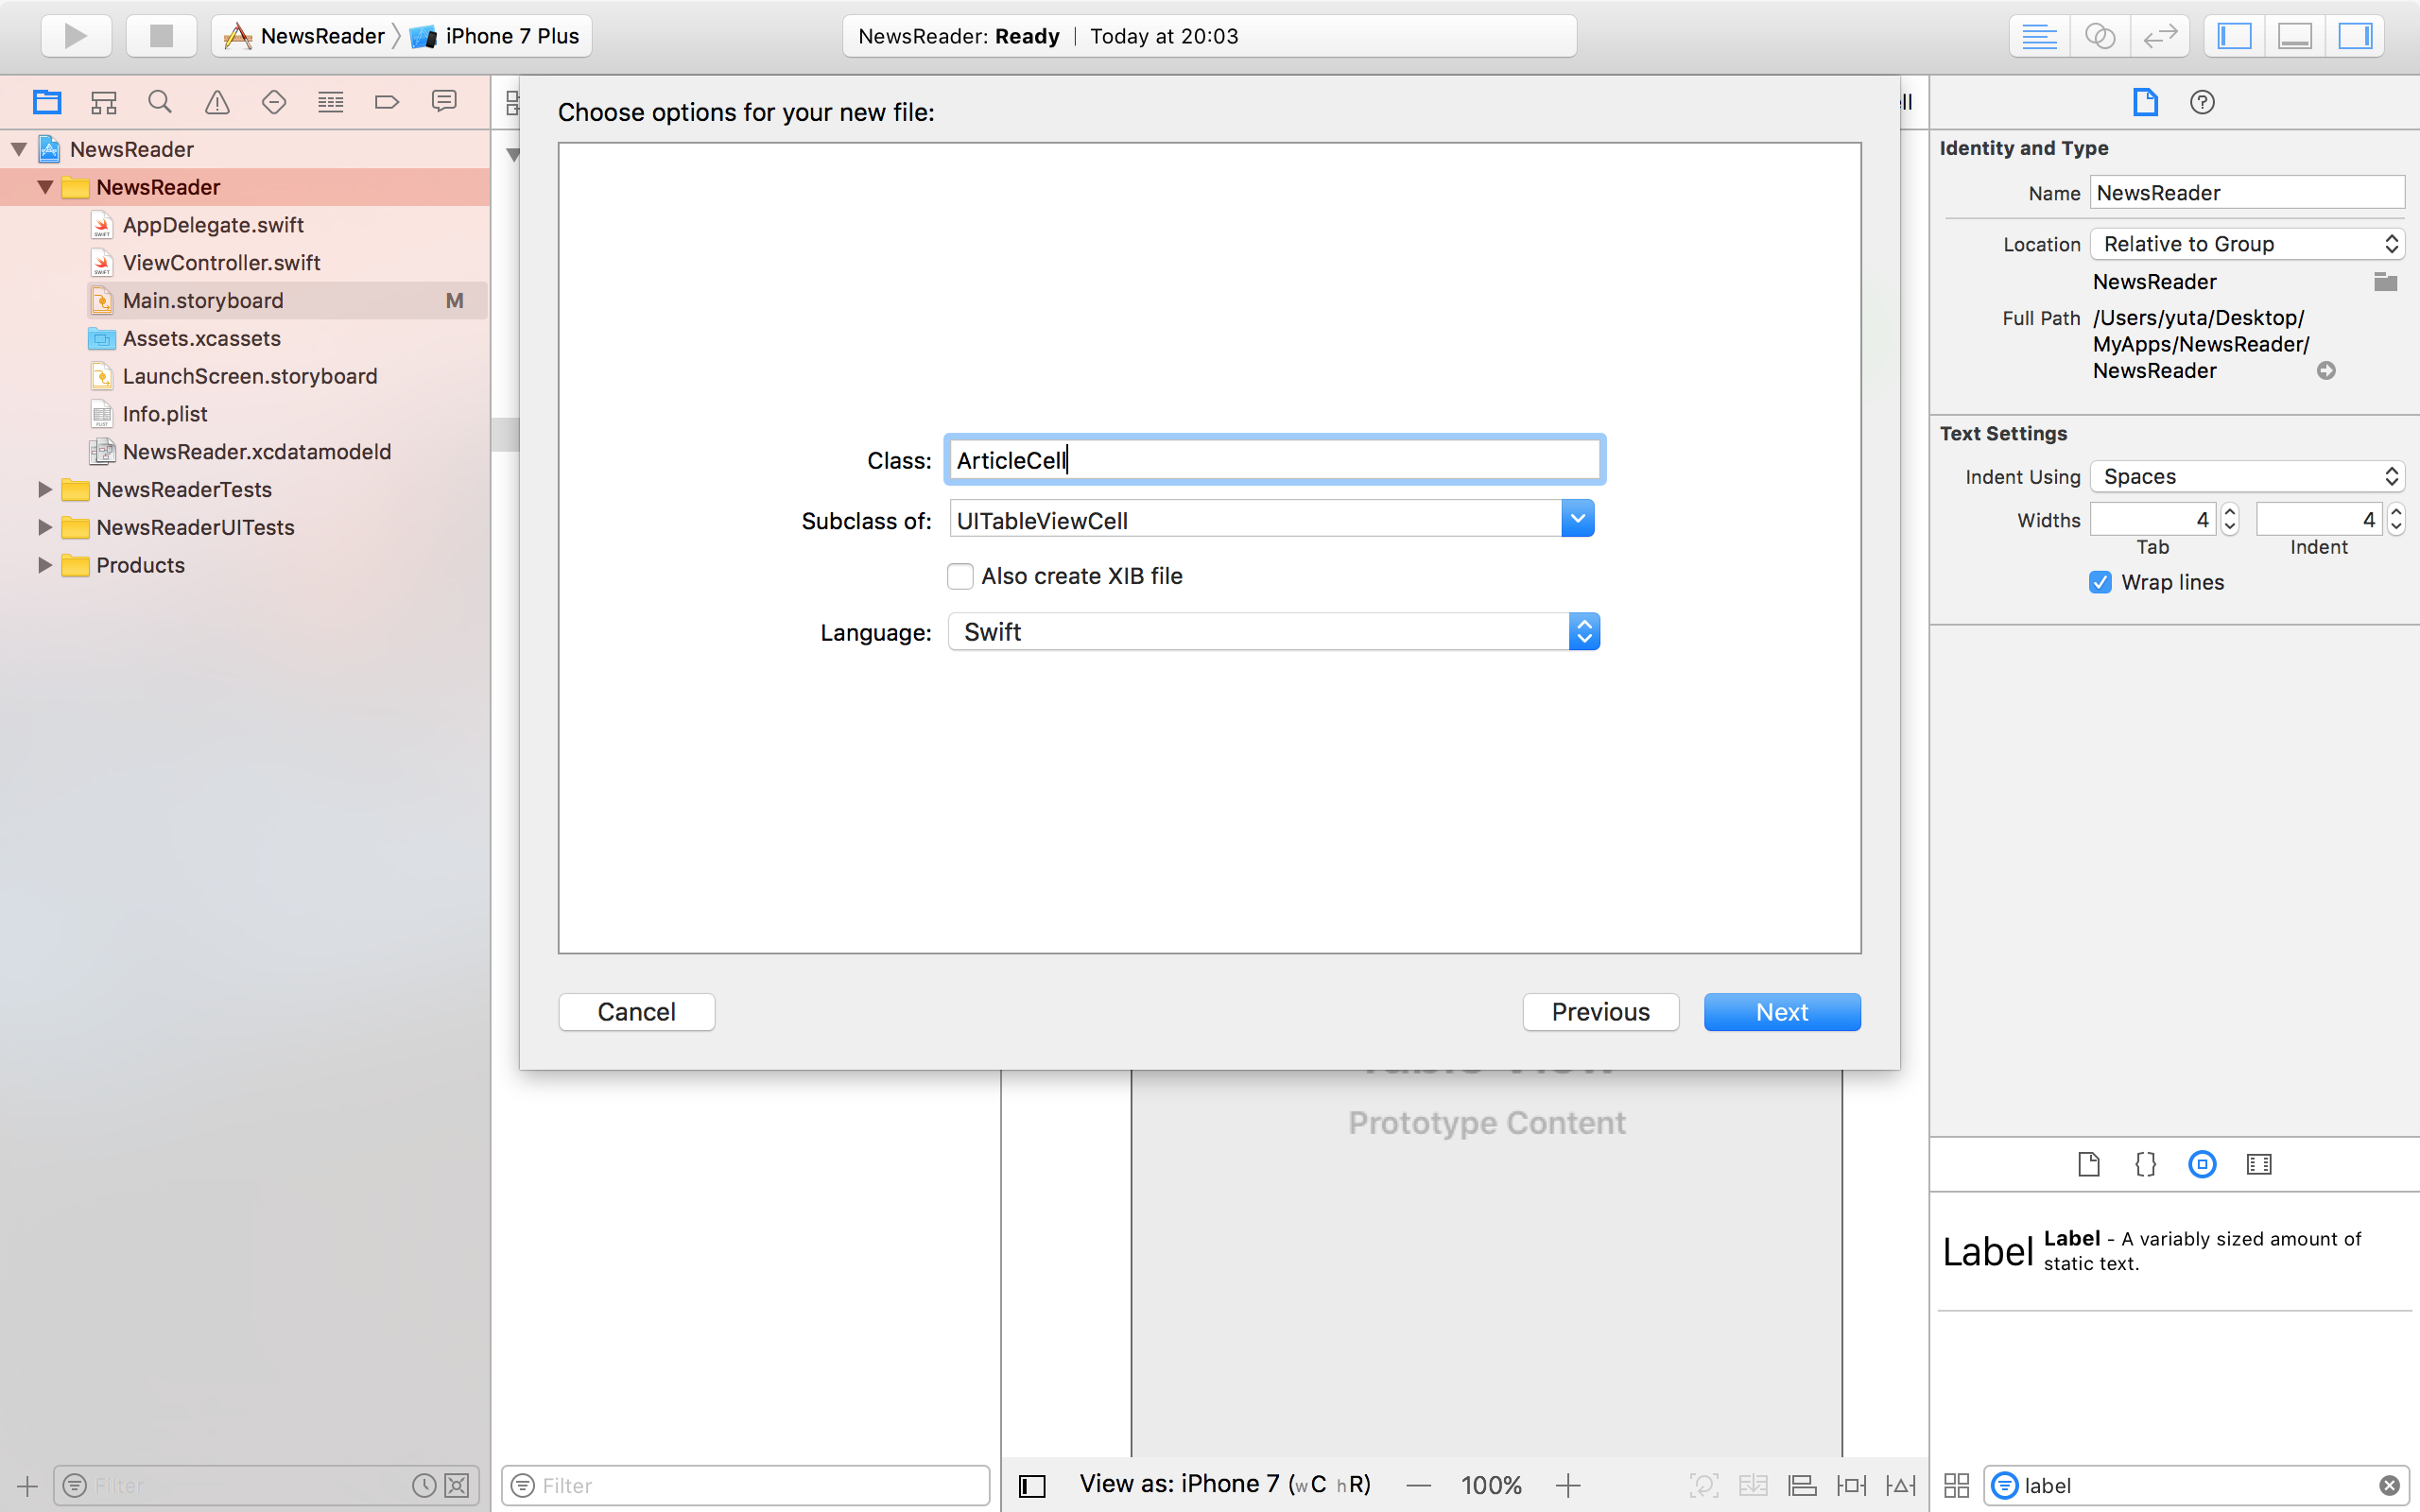
UITableViewCellを継承する
UIKitのUITableViewCellを継承してカスタムセルの表示方法を設定する
ArticleCell.swiftを作成する。
MainStoryboardから各パーツからArticleCell.swiftに紐付けをする。
import UIKit

class ArticleCell: UITableViewCell {

    @IBOutlet weak var imgView: UIImageView!
    @IBOutlet weak var title: UILabel!

    override func awakeFromNib() {
        super.awakeFromNib()
        // Initialization code
    }

    override func setSelected(_ selected: Bool, animated: Bool) {
        super.setSelected(selected, animated: animated)

        // Configure the view for the selected state
    }

}
同様にArticle.swiftで記事のオブジェクトを作成。
現在は取得するタイトル、URL、画像URLを受け取るように設定している。
import UIKit

class Article: NSObject {
    var title: String?
    var url: String?
    var imageUrl: String?
}
ViewConrollerでtableViewのセルに値を設置する
func tableView(_ tableView: UITableView, cellForRowAt indexPath: IndexPath) -> UITableViewCell {
let cell = tableView.dequeueReusableCell(withIdentifier: "articleCell", for: indexPath) as! ArticleCell
// セルのタイトルにテキストをここで設定する
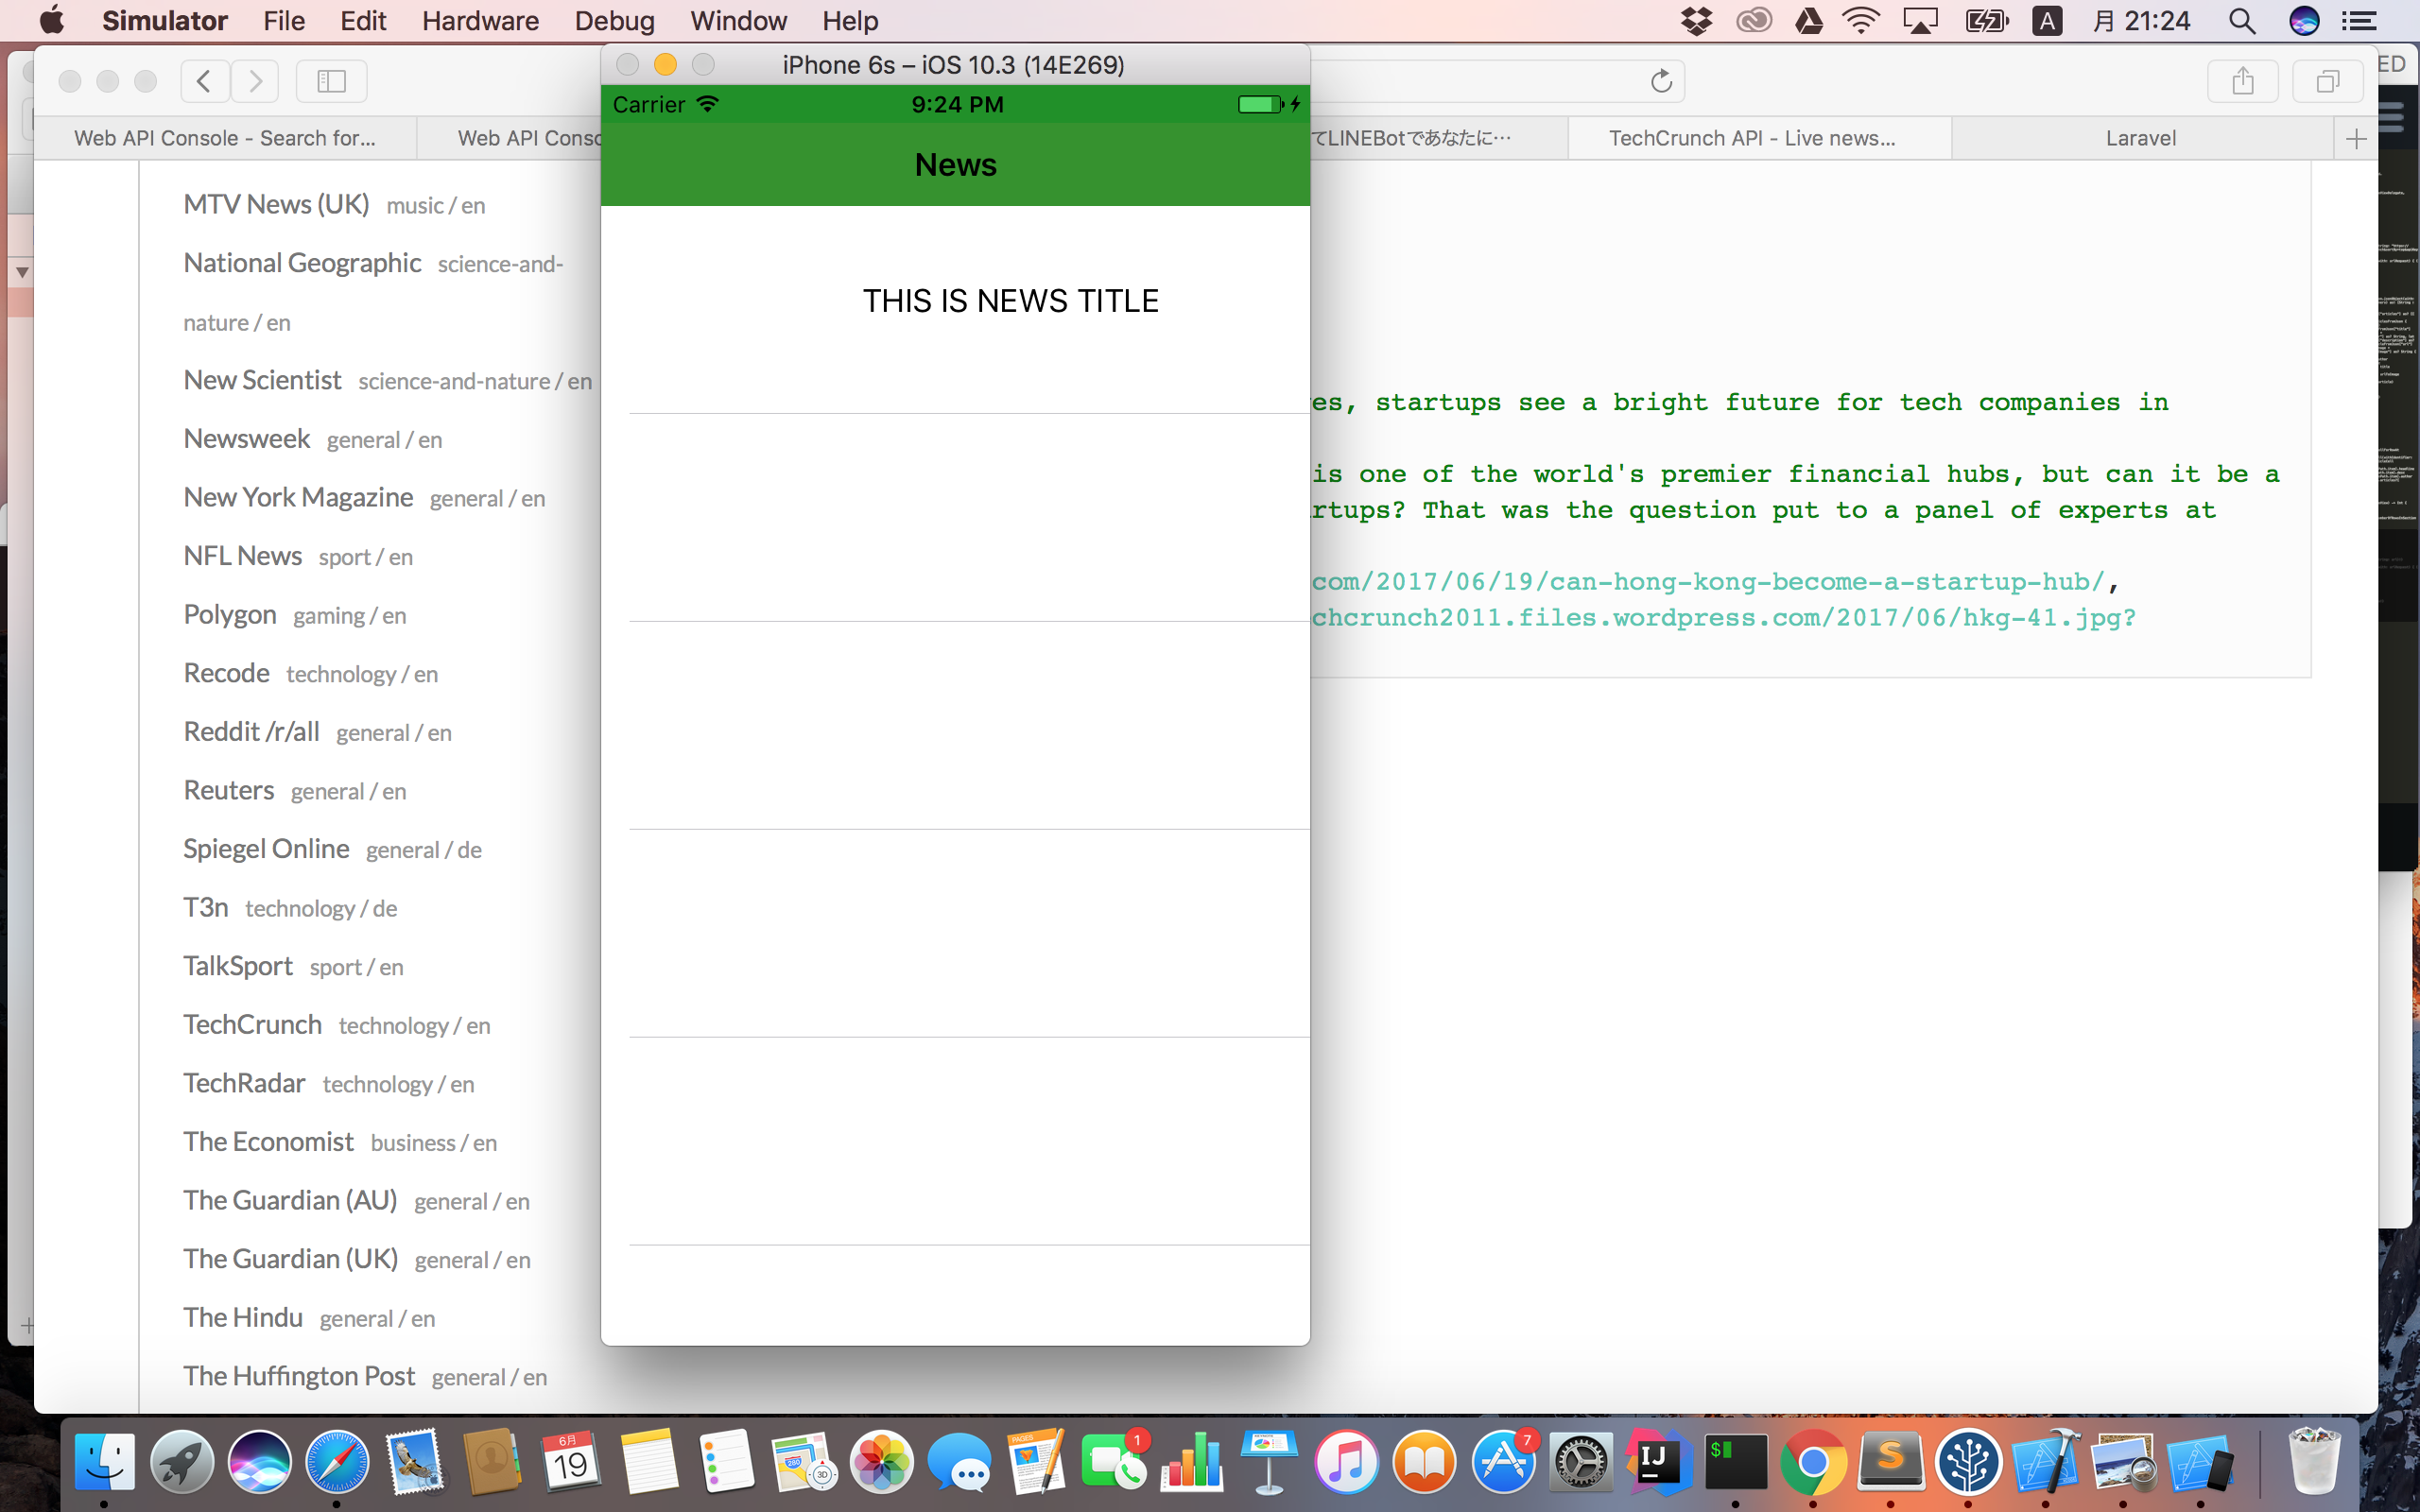
cell.title.text = "THIS IS NEWS TITLE"
return cell
}
func numberOfSections(in tableView: UITableView) -> Int {
return 1
}
func tableView(_ tableView: UITableView, numberOfRowsInSection section: Int) -> Int {
return 1
}
これだけでbuildすると以下のようにシミュレータが起動して
設定した値がtableViewに入っていることがわかる。
次回
今回はstoryboardの使い方をメインに画像で解説していきましたが実際に取得するための実装を
swift3でニュース配信アプリを作ってみる #2 (実装編)
にて続きますのでそちらをご覧ください。